
Today I’ve got a quick and simple tip/tutorial for you to jazz up your washi tapes. If you’re like me, you probably have lots of washi tapes in your stash, and can’t help wanting to add even more to your collection. But we all know that each roll of washi tape lasts a long time, and it will take a long time to finish up even one roll. Not to mention that sometimes, we get tired of the designs we own (even though we still really like them) and just want something different for a change.
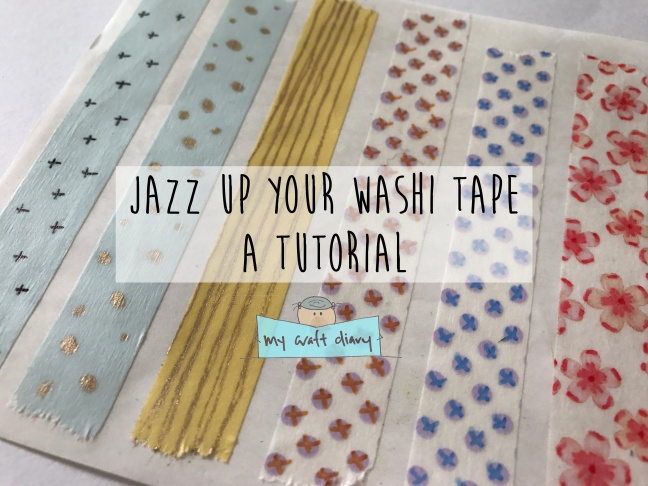
Well, I’m here to share a way for you to jazz up the washi tapes in your stash so you can get different looks from the same washi tape – and that’s simply by doodling on your washi tapes with a pen or marker! And it sounds simpler than it actually is. Take a look at some of the ones I made:


I first laid down strips of washi tape on sticker sheet backing so I can work on them on a flat surface. I tend to keep sticker backings for projects involving tapes and handmade stickers so it’s easier for me to work on them or store them, and I can shift them out of the way easily. You can of course work on them on any surface that the tape won’t stick permanently to, such as a non-stick crafting mat/sheet, waxed paper or deli paper.
Now onto the designs! You can see from the examples above that there are many designs you can doodle on your washi tapes. You can make dots and any other polygonal shapes you want, or just make a variety of lines, such as stripes, plaid, zigzags, dashes, ‘x’, ‘+’. Really, any kind of mark making will work here. You just want something that will jazz up your washi tape and make it look a little different. Try using different colours for the same design, and you can end up with a washi tape that has a different look to it. Even adding some highlights to the original design will give it a different look, as seen in the sakura washi tape.
You can use just about any pens and markers you have in your arsenal. In the above examples, I used Sakura Gelly Roll Metallic Gold, Staedtler Pigment Marker and Kuretake Zig alcohol markers, but any gel pens, pigment markers or alcohol markers should work. I didn’t show it in the photos, but water-based markers will work as well. You do need to let the gel pens, pigment markers and water-based markers dry for some time though, and be careful not to smudge them while you’re adding your designs, because the surface of washi tape tend to repel them. I let mine dry overnight and they were completely smudge free by the morning!
I hope this blog post has given you some ideas on how to jazz up the washi tape in your stash, and make them go further, and no longer repetitive and boring. Don’t be afraid to try out different designs! If you mess up, well, it’s just a small strip of washi tape and you can always start over again without fear of ruining your whole roll of tape. Hope you have fun with your washi tape (:
Here are the links to the washi tapes that I used in my photos: plain pastel yellow, plain baby blue, purple dots, sakura blossoms. I try to link to Amazon whenever I can because I am an affiliate member of Amazon, and I will receive a small amount if you shop through the links (at no additional costs to you).


