I’ve been feeling quite meh in the last couple of weeks, and haven’t really wanted to blog anything. I’m still doing something crafty everyday, but it’s been less about completed projects but just puttering about doing something in the craft room. Most days I’m working on something a little bit a day, and it takes my days to complete a task and it’s been messing with my sense of time a little bit, if I’m honest. Before I know it, I’m lagging in more than 20 days of my 100 Day Project to report, and I can’t even begin to tell you what I did each day since I can’t remember yesterday’s breakfast. So I’m going just give a summary of the main things I’ve did over the last month or so, and hope my memory doesn’t fail me too badly.
Took longer that I expected to share the next progress on my 100 Day Project but I have been sick in the last week and that really dampened my energy level. I do hope I still can recall what I did and my enthusiasms back then and capture them here.
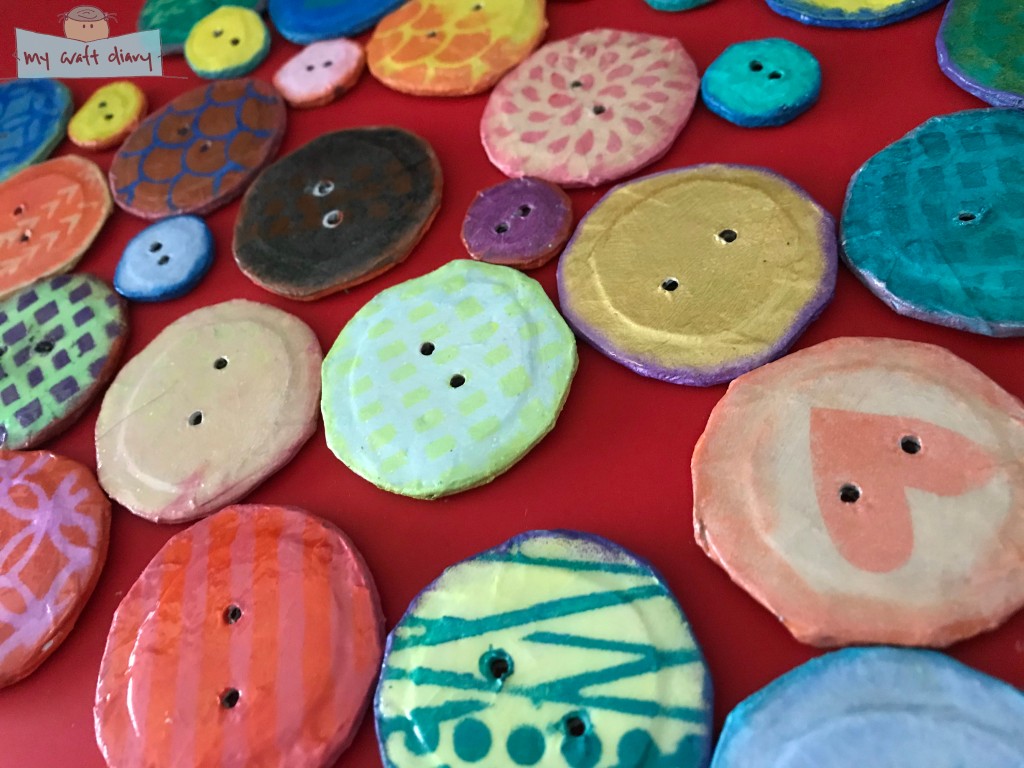
So Day 19 was spent on an old incomplete project that has been sitting in my shelves for years. At some point in time, I made a bunch of recycled buttons out of cardboard. I don’t recall why, since I still have some that I previously made, but it’s probably could be that I wanted to use up some of those collected cardboard (I collected way more than I use them!). This is from an old Jennibellie tutorial, and there’s 2 parts to it – making the buttons, and decorating it. I made the buttons in a previous setting (years ago!), so today is all about decorating it.
I’ll admit, I didn’t follow Jenni’s tutorial to use ink pad for quick colour coverage since I had forgotten all about it, so used acrylic paint for all them instead. In my previous making of the buttons, I stuck with plain buttons with no decorations, so I wanted to try something different, pulling out some stencils and silkscreens for the decorations. Here’s a look at them after all the painting and decorating:
I quite love how they turned out, not sure why I left them as plain the previous time! I did leave the smaller buttons plain, as I didn’t want it to be too busy. Some things I learnt from the process:
Some patterns work better if they are printed partially. Some patterns work better if they are printed completely.
Colour is very important. Contrasting colours is a big no no, or at least I didn’t like how those come about. Audition colours before committing.
I love the look of a single focus image from the silkscreens – that’s the heart and star patterned ones. They’re my favourite!
Decorating all these buttons took up most of the afternoon, but there was still one last step to complete these buttons, which is to glaze them. Boy, if I thought decorating is hard, that’s nothing compared to glazing them! I used Glossy Accents for glazing as I like the glossy enameled look it gives my buttons. Jenni prefers Diamond Glaze, but I don’t like that because it’s too thin and the textured surface will show up. Glossy Accents bottles are a little finicky though, and they dry out the nozzle when I’m working over a period of time. My hand and neck were hurting by the time I’m done with my session, and that will still with half the buttons left to glaze! By then I was tired out and running low on Glossy Accents, so I had to order a new bottle.
Here’s look at the buttons after the Glossy Accents dried, I love how shiny they looks almost like real buttons. They’re great embellishments since they are pretty lightweight, and now I have a bunch of them ready to use!
Perhaps blogging only periodically is not the best way of marking progress on a 100-day long project, but in the last week, I have been otherwise occupied and lacking sleep, so I really didn’t want to start blogging at 12 midnight. Highlights of my reflection/learnings in the past week:
I learnt that I can’t multi-task. At any one point, I can only dedicate my energy to one project at a time, and can’t spare the energy or creativity to nurture other things. Note to future self: if I choose to continue this project in the future, I ought to narrow down the things I want to accomplish so that I can really focus and complete it.
I made my first lapse and didn’t show up on Day 8 and 9. I think on Day 8 I may have watched some online class videos, and I did something really quick without thought on Day 9. Instead, I locked myself up in an imaginary world, completely sucked into this Harry Potter fanfiction that I was reading. It’s the first time in a while since I was really immersed in a fictional world, so I let myself get carried away and live in it for two days. Did I regret it? Absolutely not, it was the most amazing experience and it’s indulging in my creativity so in my mind I kinda let myself off as it being part of ‘My Craft Diary’.
I work best by striking the iron while it is hot. When I get an idea, I work on it immediately, because it slips out of my grasp if I sit on it. When the muse strikes, I just keep doing until I run out or until I’m tired, and those are the most productive and rewarding days. The problem comes if the muse strikes at say 12 midnight, and I have to either sacrifice sleep or my creativity. Most days I sacrifice sleep, but even I can admit that lack of sleep is getting to me, and there’s this almost constant throbbing between my eyes that make it hard to concentrate sometimes. Managing the balance is still key here and I hope that I get better at this by the end of this 100 days.
I have short term memory. Weekly review sounds like a great idea, until I cannot remember what I did on which day and have to think really hard on what I did.
Last week’s craft diary is a little more varied. I worked on different journals which then prompted me to use different supplies according to the different journal’s style. Here’s Day 7-13 #100daysofmycraftdiary highlights in photos:
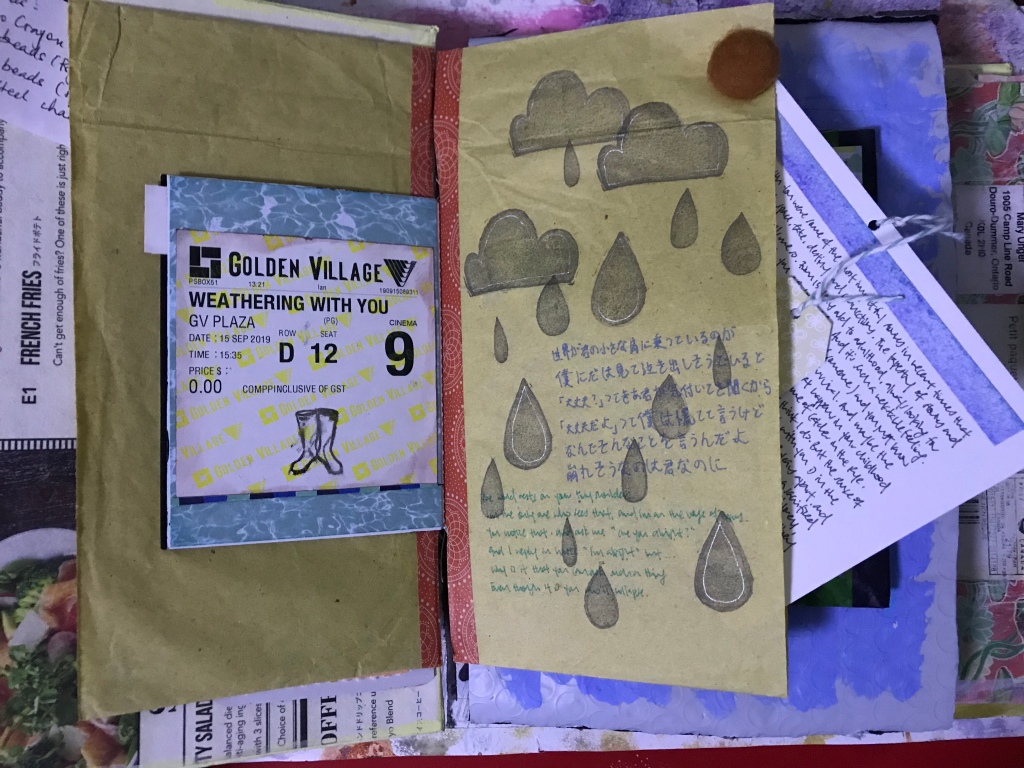
This is from my Smashbook, and I made this spread previously for ‘Weathering With You’ the movie. Day 7 saw me writing the little journal card that was tucked into the pocket here, reflecting and writing stream of conscious regarding the movie and whatever I linked it to.
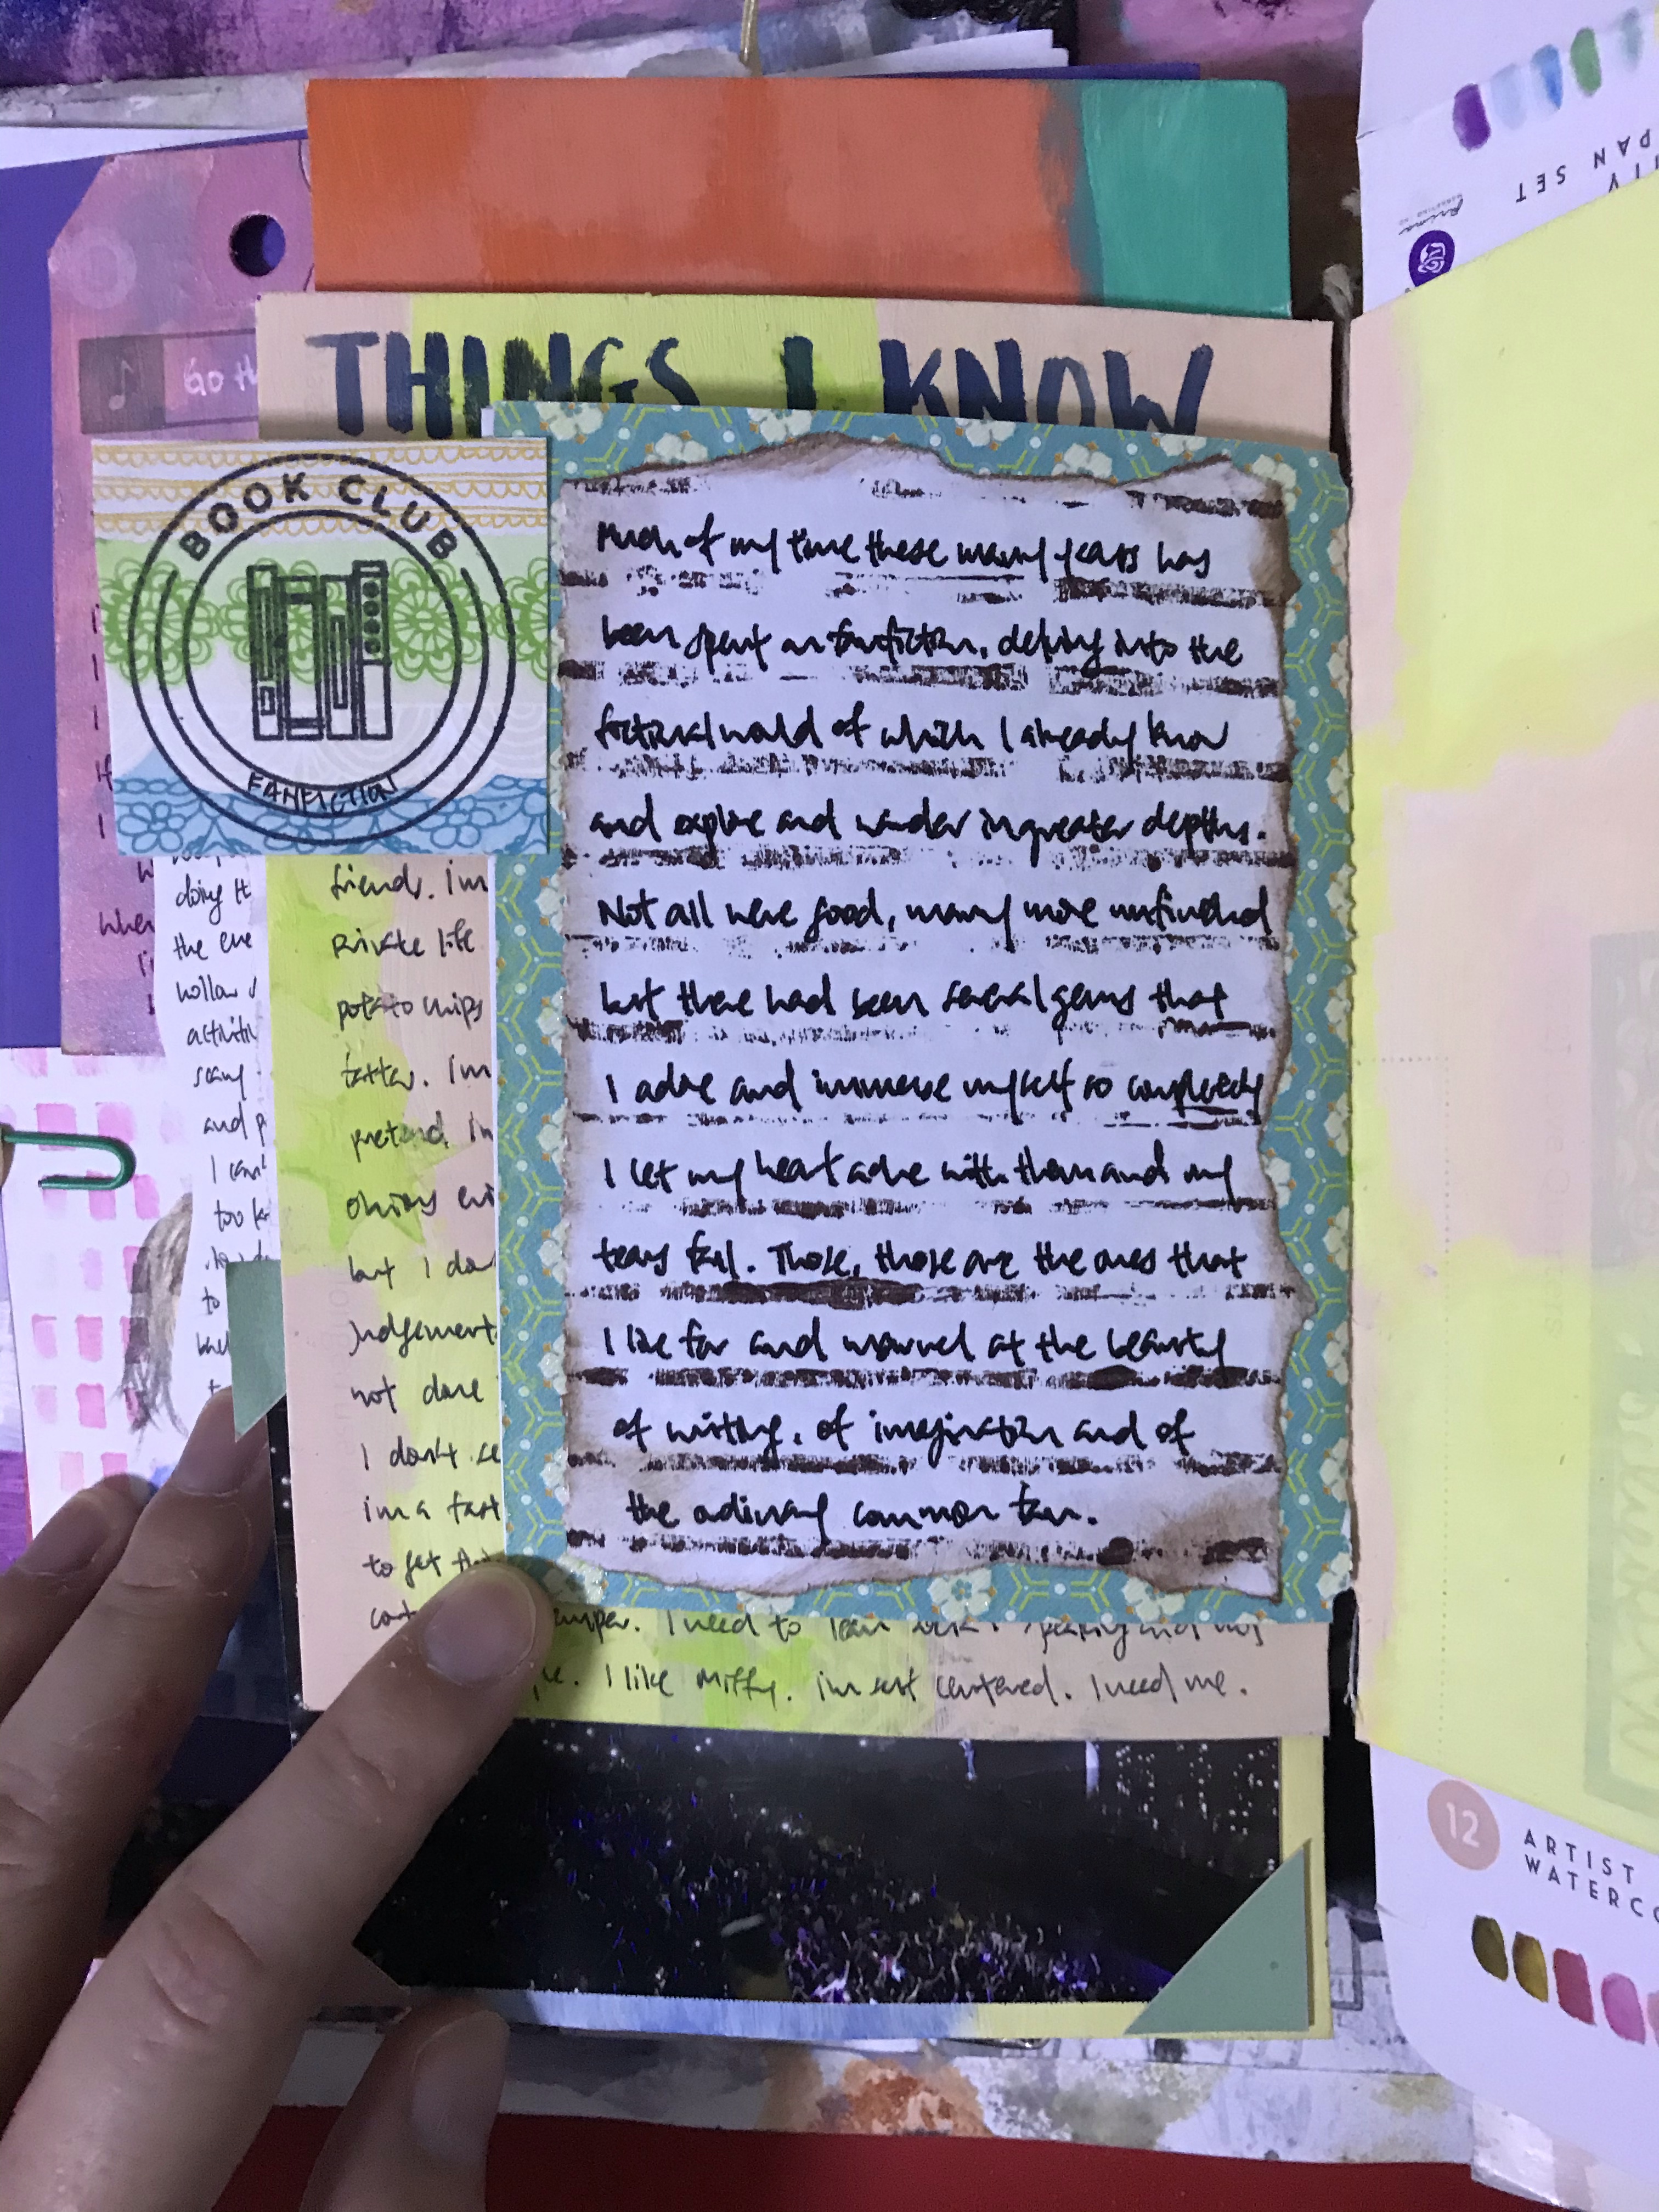
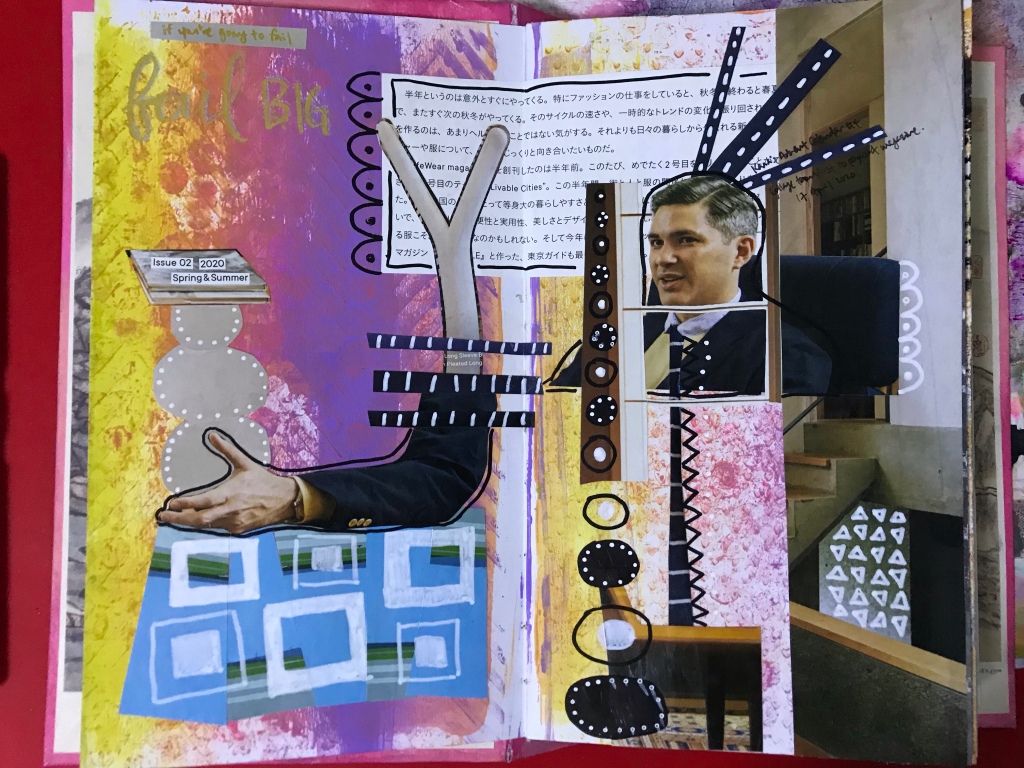
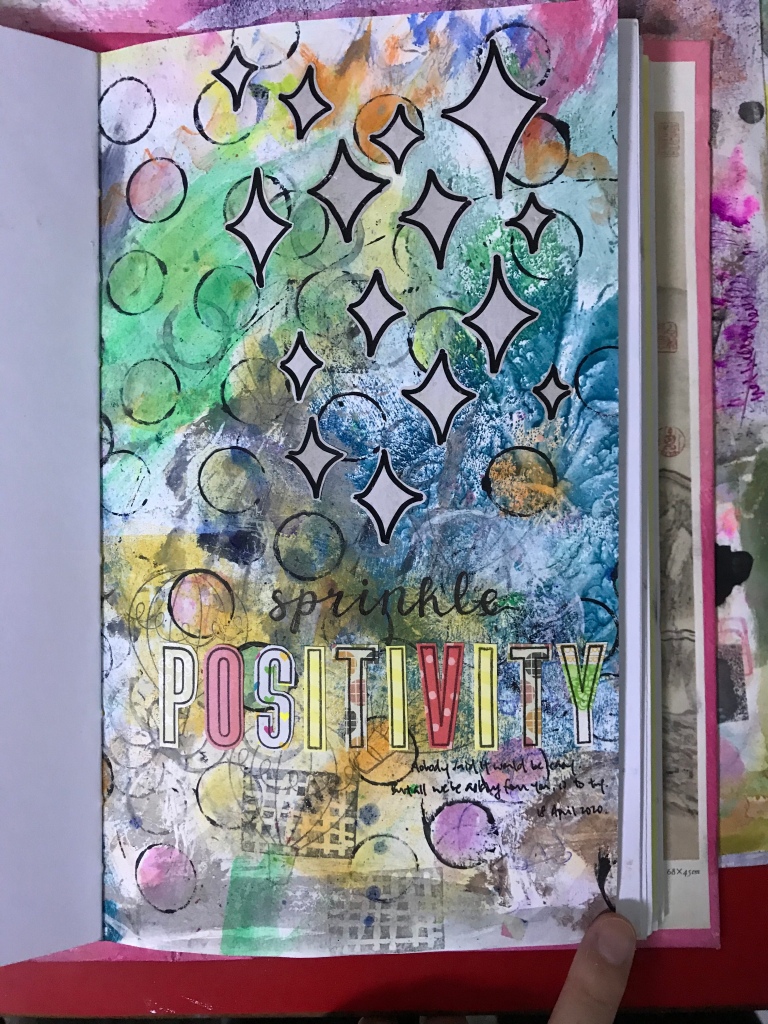
This came from my 30 Days of Me journal, from Maggie Holmes’s class from Studio Calico. I made the little spread on the left based on Prompt #15 ‘Reading’ on Day 9, which tied in nicely since I was immerse in literary world the whole day. It was really quick as it was late at night and I had massive headache. The page is actually a card I received from an Art Swap earlier, the ‘Celebrate Art!’ came with the card. On the right is further journaling I wrote on Day 10, because I wanted to spend some more time to journal about my reading. The journal spot is something I made, see next picture! Day 10: Played around with corrugated cardboard printing. I peeled off the top layer of cardboard to reveal the corrugated cardboard below (left in the picture). Then I used acrylic paint to print on an old blank notebook papers that I was going to throw away, turning them into sheets of journal spots instead. I love how the prints turn out and they make nice grungy journal spots, as you saw in the picture before this.Day 11: Art journal page “If you’re going to fail, fail big.” Went back to Kasia’ Advent Calendar prompt #4, ‘Collage using elements from first 10 pages of a magazine’. This was very challenging for me, but also fun as I tried to use elements in different ways from how I usually would. Where I would usually use elements as a whole, I cut apart the elements to utilise them instead. Titled so because I felt like I failed the prompt – I don’t hate how it turns out, but it definitely didn’t speak out to me. Some elements that I really liked includes the random arm (cutting limbs shall be a new fetish), cutting circles and cutting strips from a ‘pattern’. I cheated and used paint marker to tie some of the elements together. I may try this again as it was rather freeing to just put together collage elements. You may recognise the background from last week’s rainbow roll page.Day 12: Flipped through my scraps folder and found some transparency tags that I was gifted in an Art Swap. I used them to trace and cut out some tags and thought it was a fantastic idea to have plastic templates such as these. I took out some transparency scraps and cut out the two template on the right, meant to be pockets in a journal. These were gifted to me together with the transparency tags, but the paper is rather thin and not suited to be used as templates. Now that I made the plastic templates, I can stop hoarding them and use them as I wish! Day 12: Art Journal page “Sprinkle Creativity”. Sometimes as I craft I like to have something playing in the background. Sometimes it’s music but mostly I try to opt for a podcast since it is the only time I can have podcast on and do something else at the same time. This day, I had Amy Tangerine’s podcast ‘Craft a Life You Love’, Episode 50 ‘Sprinkle Positivity Confetti into Your Everyday with Natalie Keller Pariano’ which directly inspired this page. The ‘sprinkles’ were scraps from Day 11 collage page. It doesn’t show up on camera, but I added some subtle sparkle to them using a clear Wink of Stella marker. The colourful background is from a waste paint paper that I bounded into my art journal. Always fun to work on a non-blank page in my art journal. Day 13: Art Journal page “Go for a walk”, from Day 5 of Kasia’s Advent Calendar prompt of the same name. The journaling reads “Imagine going out during covid lockdown. I see trees from my window instead.” I was inspired by the leaves of said tree, and I wanted to made an all over pattern. Thought of August Wren at the same time, so I took out my gouache and coloured in a background afterwards. That didn’t work out too while because my burnt umber and burnt sienna come out of their tubes as a crumbly mess, so they are really difficult to work with. It shows up in the unevenness here, as I can’t mix a puddle of colour and can only do a small bits at a time. Otherwise, I love the creamy texture of my gouache, but I feel a learning curve for this medium.
Phew, that’s a lot of sharing at one go huh. Maybe I should revert to daily posting instead for the next week. We’re two-weeks into the project and still 76 more days to go. Welp. But I’m excited, are you excited about your project too?
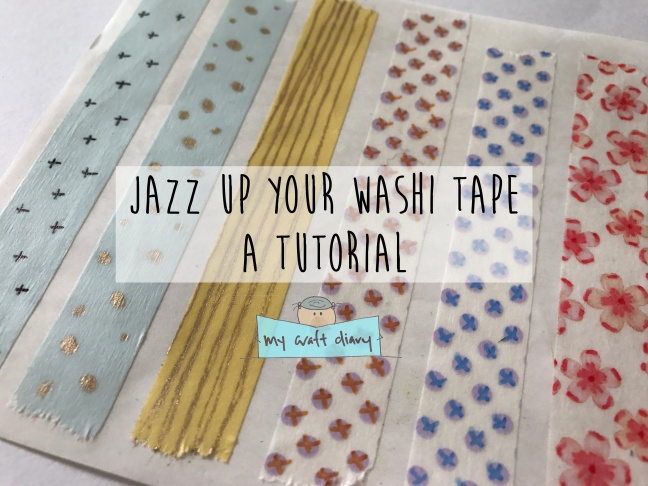
Today I’ve got a quick and simple tip/tutorial for you to jazz up your washi tapes. If you’re like me, you probably have lots of washi tapes in your stash, and can’t help wanting to add even more to your collection. But we all know that each roll of washi tape lasts a long time, and it will take a long time to finish up even one roll. Not to mention that sometimes, we get tired of the designs we own (even though we still really like them) and just want something different for a change.
Well, I’m here to share a way for you to jazz up the washi tapes in your stash so you can get different looks from the same washi tape – and that’s simply by doodling on your washi tapes with a pen or marker! And it sounds simpler than it actually is. Take a look at some of the ones I made:
I first laid down strips of washi tape on sticker sheet backing so I can work on them on a flat surface. I tend to keep sticker backings for projects involving tapes and handmade stickers so it’s easier for me to work on them or store them, and I can shift them out of the way easily. You can of course work on them on any surface that the tape won’t stick permanently to, such as a non-stick crafting mat/sheet, waxed paper or deli paper.
Now onto the designs! You can see from the examples above that there are many designs you can doodle on your washi tapes. You can make dots and any other polygonal shapes you want, or just make a variety of lines, such as stripes, plaid, zigzags, dashes, ‘x’, ‘+’. Really, any kind of mark making will work here. You just want something that will jazz up your washi tape and make it look a little different. Try using different colours for the same design, and you can end up with a washi tape that has a different look to it. Even adding some highlights to the original design will give it a different look, as seen in the sakura washi tape.
You can use just about any pens and markers you have in your arsenal. In the above examples, I used Sakura Gelly Roll Metallic Gold, Staedtler Pigment Marker and Kuretake Zig alcohol markers, but any gel pens, pigment markers or alcohol markers should work. I didn’t show it in the photos, but water-based markers will work as well. You do need to let the gel pens, pigment markers and water-based markers dry for some time though, and be careful not to smudge them while you’re adding your designs, because the surface of washi tape tend to repel them. I let mine dry overnight and they were completely smudge free by the morning!
I hope this blog post has given you some ideas on how to jazz up the washi tape in your stash, and make them go further, and no longer repetitive and boring. Don’t be afraid to try out different designs! If you mess up, well, it’s just a small strip of washi tape and you can always start over again without fear of ruining your whole roll of tape. Hope you have fun with your washi tape (:
Here are the links to the washi tapes that I used in my photos: plain pastel yellow, plain baby blue, purple dots, sakura blossoms. I try to link to Amazon whenever I can because I am an affiliate member of Amazon, and I will receive a small amount if you shop through the links (at no additional costs to you).
Hi friends, I’m here again today with another card to show you! I made this card in the same setting as the cards I made for the Danipeuss Card Challenge – here’s the link to card 1 and card 2 if you are interested in them. For anyone else who is interested to participate in the card challenge, there’s a new challenge up already, which you can check out here too!
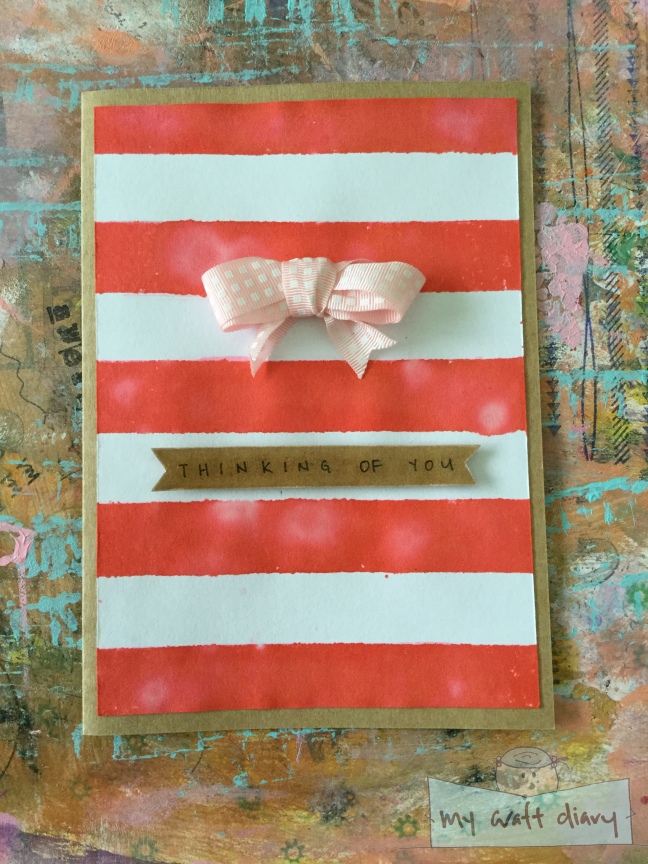
This card started out as an experimentation of sorts, as I play around with supplies that I don’t usually use. I stamped the background with a striped border stamp using a red dye ink for some patterned background. It didn’t ink too well though, for some reason, and I can’t tell if it’s because I’m not using a mounting block or the stamp itself, because the results is the same when I use a pigment ink. Nonetheless, I went with it and took the splotchiness as a design feature as well by spritzing the whole panel with water mixed with perfect pearls. I got this idea from Jennifer McGuire, and it’s basically just filling a spray bottle with a spoonful of perfect pearls. You get a nice light shimmer coverage when you use this, which is really nice to add just a little something special to backgrounds. The light shimmer didn’t show up too well on the camera though, so I can’t show you how that actually looks, but it’s a really pretty and subtle shimmer.
I got some water on the card accidentally, and because I used dye ink on a super absorbent paper, there were some water splotches on the card as well. To cover up the mistake and to make it seem as though it is part of the plan, I dripped more of the perfect pearls water onto the water splotch and then elsewhere on the card. Some splotches are larger than others, and you get a nice pearly splotch if you drip enough on it, as it pushes the dye ink away. It’s also kind of meditative to watch the water push the ink away like a ripple effect. Here’s some close up look of the splotches:
You can see the slightly lighter colouring of the splotches, as well as a more concentrated dose of the shimmer.
The focal point of the card is this cute little ribbon that I’ve tied. While waiting for the background to dry, I came across this video on how to tie a ribbon in less than a minute, so of course I had to try it (and break out my stash of hardly ever used ribbons in the process). It turns out that the ribbon are really embellishment worthy if you have some nice coloured ribbons and the pink ribbon looked really nice when I auditioned it against the background. I glued the ribbon to the panel with some fabric glue, but any wet glue should work fine.
I decided to use the sentiment “Thinking of you”, which I thought would be a nice complement to the ribbon and the sweet colour scheme of the card. I wanted to keep the card basic and the focus on the ribbon, so I opted to write out the sentiment, rather than stamping it on. To echo the wide distance of the striped background, I first drafted out the sentiment on a grid paper, and then used it as a guide when I wrote out the sentiment on kraft cardstock. It’s not perfect placement, because I stumbled a little when I was writing it, but it’s close enough that I don’t scrutinise it – it’s alright to not be perfect in your projects! A tip if you like to hand-write sentiments or words like me: scrap pieces of cardstock are excellent for adding sentiment or word banners! You get to use up all the thinner scraps that don’t get much use otherwise and the thinner width makes it easier for you to align your writing or when trimming it. For the last finishing touches, I went over the entire banner with a Wink of Stella clear glitter pen, and coated it with a coat of Glossy Accents for an epoxy look.
Really like how that shimmer looks under a layer of Glossy Accents!
This is a really simple card put together with some basic supplies, and of course lots of play and experimentation. I hope you enjoy the various cards that I’ve shown you over the past week! If you made a card inspired by this card, share your card with me in the comments below! I would love to see what you made (:
Disclaimer: Some of the links above are affiliate links, and thus I would receive a small amount (at no addition costs to you) if you purchase through the links above. Your purchase will help support the blog and my small crafting business, and it will be much appreciated (:
After years of deliberation and even more months of resistance, I’ve finally gotten around to selling the stuff I make online. I’m now selling my stuff on Carousell, which is mostly a local platform where people sell things, old and used alike but if you like any of the stuff I’m selling, and you’re not from Singapore, feel free to email me at mycraft.diaryshop@gmail.com to contact me and we can arrange something out.
You might notice that I’m not only handmade stuff on the shop. That’s because it started out with a few steps to overcome my own resistance, and selling old stuff that I no longer use/enjoy while purging my stash was a good way to start. It then evolved a little to selling the stuff that my mum didn’t want to keep in the house anymore, since a lot of people sell them on the platform as well. And then I finally finally got around to putting some of the stuff that I made. It’s not a lot at the moment, just some minibooks that I made, and painted tags from my stash. I’m planning to add more stuff, particularly handmade cards, which should give me an excuse to create them. I like to make cards, but I don’t send them out too often. Sure, my friends enjoy receiving them but it gets kind of funny just sending out cards again and again without any reply… Nowadays I mass send them on special days so I mass produce for that purpose too, which isn’t too creatively challenging if you ask me. But the alternative would be too tiring to make like 9 different cards for the same purpose within a short period time.
Really need to thank Jennibellie and the folks over at Journal Workshop for giving me this mental push and butt kicking to overcome my creative resistance for this May’s monthly challenge. But this is a start at least, as I’m one (baby) step closer to overcoming my creative resistance. I hope that this too would perhaps inspire you to tackle your creative resistance as well.
I drink tea a lot, mostly black tea. A few years back I decided to try staining paper with tea because I’ve read about how it can aged paper so I started to do this when I had the time after a cup of tea. I experiment too, with different ways of making stained marks on the paper for some variety, even though by the nature of it each paper would be unique. I was staining some papers again today so I though I share a little on my process.
I will make a cup of tea of myself, and once I have finished the tea I will use the teabag for staining. Most of my tea are store bought and in pre-packed teabags. Each teabag can stain several pieces of paper, depending on how large the paper is too. I usually stain 11″ x 14″ papers, and do about 2-3 sheets of them, though you can definitely do more should you wish to. One important thing: teabags are rather fragile, so they will break apart during this process, which will end up in some degree of mess when the tea leaves come spilling out everywhere. So work on a surface that can be easily cleaned up. I also don’t recommend cleaning up immediately after this project, because the tea leaves are wet and in a clump, which doesn’t clean off that well. It is easier to clean them when they are dry, unless you are using a vacuum cleaner.
Here’s a look at the two sheets of paper I stained today:
First sheet of paper. Technique: dragging teabag across the paper
Second sheet of paper. Technique: pouncing teabag across the paper
I often start off with a light touch, so that the teabag doesn’t break apart that easily. The more tea leaves you have in your hand, the more number of sheets you can work on, so keep them in mind if you would like to meet many sheets at once.
The first sheet of paper is done by simply dragging the tea bag across the paper. I use the string attached to the tea bag to pull it across the paper so you can tell that the stains are a little bit more continuous. You could fill up the entire sheet of paper with stains if you wanted to, but I left some white spaces around for some interest. Dragging the teabag is probably the gentlest form of staining, as you can tell by the lack of tea leaves on the paper (as compared to the second photo). Do also take note that the first sheet of paper you work on would also buckle more than the others, because the teabag would still be rather wet from the tea drinking session.
The second sheet of paper is done by holding the teabag with your hand and then randomly pouncing onto the paper. This is when it starts to get rough and the teabag starts to break apart. You can tell by the tea leaves that are scattered all over the paper. However, this technique also gives you better control and a much more varied look and intensity of stains.
You can go even rougher and more intense from here, though I didn’t do them today because I wasn’t in the mood to clean up from the mess it would create. You could rub the tea bag on the paper, in a motion similar to ink blending tools. This causes the tea bag to rupture the most, spilling the tea leaves everywhere. The resulting stain will leave the marks from the rubbing motion, so it’s another different look altogether.
To clean up, I would suggest leaving the paper to dry. Once they are fairly dry you can proceed to brush off the tea leaves off the paper. As I mentioned earlier, this would be a much easier way to clean up when the tea leaves are dry. I mostly use these pieces of paper to make my art journals, treating them like patterned papers. You could do the same technique on like cardstock for cards or scrapbooking and any kind of paper actually. Hope you would give this a try and if you have any other technique of making stained marks on paper with teabags, share them in the comments below!
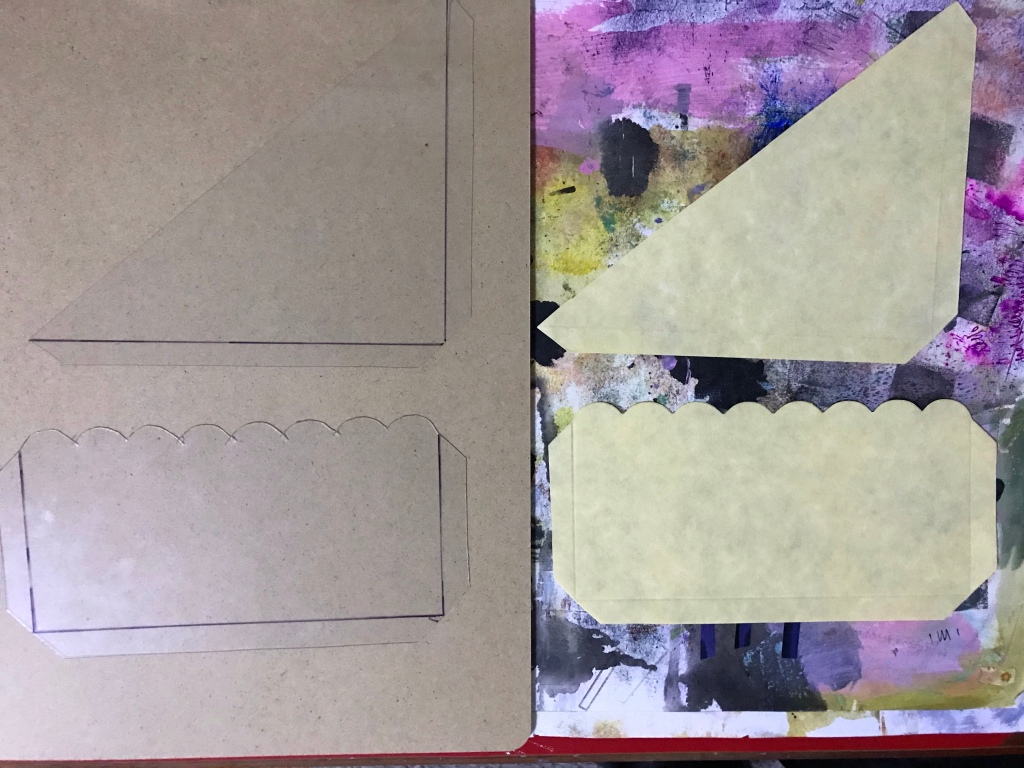
I was clearing out stuff from another room when I saw a stack old ikea catalogue that I have kept and collected. Since I had never actually used them for anything, I was going to throw them out until I thought: why not make some envelopes with them and see if I like them? And so I did.
I picked out the pages with mostly full blown images and got out my WRMK envelope punch board. That’s a handy tool to have if you like to make your own envelopes because it saves you quite a bit of hassle (I used to use my Martha Stewart scoreboard but getting the measurements right was rather tedious). Even though I tried to make the paper have minimal words, bring a catalogue there are inevitably some words on the envelope, which I wasn’t too happy with. I wanted to cover them up and thought of using my stash of deli paper that were already covered by paint.
Deli paper covered recycled envelopes
I use deli paper like palette paper until I feel that it is colourful enough, but haven gotten an idea of how to use these paint covered deli paper before this. So that’s killing two birds with one stone, for I am getting wary of my accumulating stash of deli paper.
This can be easily done by spreading PVA mixture (PVA glue + some water) on where you want to cover and then placing the deli paper on top of it. To make sure the deli paper stick well, go over the top of it with glue as well. You can see from the picture that for some envelope I didn’t fully cover the envelope with deli paper while some is completely covered. The prints from the catalogue do show through in some areas but it adds a nice texture to the envelope. It’s also a great way to turn your deli paper into colourful envelopes by just using the magazine paper as a backing to give it some weight. I didn’t cover the inside of the envelope with any deli paper but that could also be an option if you are bothered by how the paper looks when you open the envelope as well.
Hope you enjoy this mini recycling project and tips for prettifying the recycling envelopes!
Note: I am not affiliated with the Amazon links provided, though I did purchase the score board and deli paper from Amazon.
I’ve always been a fan of hole reinforcement rings as a child, because somehow there will always be some pieces of paper that ends up getting torn off from the file, especially file cover pages or content pages. What a neat girl I am! And of course, my life also got easier each time our teachers asks for file checks and I see my classmates frantically borrowing other people’s file to mark off which worksheets they are missing.
I always used the plastic kind because they are the most common ones but a few years back I found the white paper ones. Isn’t it nice to just have white on white without any reflection from the plastic showing? It works especially well for my book making projects when I wanted the holes to pop a little more. Then here comes the moment I thought of an idea so simple I can’t believe I didn’t think of it earlier. I wanted to label the top of my colour spray bottles, but didn’t have any circle labels at home so I used the white reinforcement rings as a substitute. And I thought: wait a minute, I can colour these white ones and then I’ll have a bunch of coloured ones that I can use for my projects and what not!
Here’s what you need to make your own coloured hole reinforcement rings:
Paper hole reinforcement rings, preferably in white
Assortment of coloured alcohol based markers
And what you need to do is to colour the reinforcement rings with the marker of your choice! Simple isn’t it? Of course there are other things you can do with the plain reinforcement rings. Stamping on a pattern, drawing with your markers or colour pencils, as long as it is not a wet media. I don’t recommend wet media because the rings get really flimsy after gotten wet (ask me how I know: I sprayed the rings to get the colour labels for my spray bottles), so they don’t work too well as a reinforcement ring afterwards. Though if it is only for decoration purposes, it shouldn’t be a problem the.
Hope you play around with this and create a whole assortment of coloured hole reinforcement rings! I’m thinking of putting up some of these in my shop for those who just want to give this a try but doesn’t want to commit to getting the supplies. They should probably be up in the next couple of days once I claim my camera back from my mum who used it for her travels. See you in the shop then!
I have a mini tutorial for you today, and it’s all about recycling! I like to minimise my crafty waste because I feel that all our crafting supplies costs quite a bit so I don’t want to throw them away if I can help it. Reducing waste is also another mantra I have because we are consuming so much in our everyday lives and throwing away as much too. As a crafty bonus, working my way around these supposedly waste items gives me new crafty ideas to work on a constrain so it’s definitely a good crafty exercise.
Today, the focus would be on glossy paper. Now, I use glossy paper as a generic term for the texture of the paper. So this includes leftover glossy coated photo paper, sticker release sheets and even release paper from double sided tape! If you are confused with why I have leftover photo paper, I use my Canon Selphy photo printer, and the papers have strips on either side of the photo that you tear off the perforated lines.
These are things that we often just discard without thinking too much about them. But with some markers and a little bit of doodling, they can be transformed into patterned strips that you can use them for borders, banners, labels, embellishments and anything you can think of!
Here’s how they look after I have decorated them:
And here are the close ups of the designs:
Stars randomly arranged or in a line
Hearts, dashed lines and decorative edge with decorative scissors
Some tips to work with these glossy coated paper:
Photo paper: Water based markers will not work on this surface, so you will have to use alcohol based markers. You can try to stamp on it, but because of the slick surface not all ink pads will dry on the surface so you need to experiment a little.
Sticker release sheet: I tried to use markers on the slippery side (where the stickers were), but the ink just puddle up. So I flipped it over and doodled on the non-slippery side instead. I used water based markers here so you can use any type of markers you want. (update: the markers didn’t dry completely even after weeks of putting them down, and will smudge a little, though some of the marks were absorbed into the paper)
Double sided tape release paper: The release paper is slippery on both sides, and like the slippery surface of the sticker release sheet, I couldn’t get ink to stay on the paper without puddling up. So instead, I used a decorative edged scissors to make a decorative edge. You can try this with any decorative scissors you might have and give a different edge. If you don’t own any decorative scissors, you can just freehand for some wonky waves or zigzags!
I hope you do give this idea a try and give some crafty life into these waste! Let me know any new ideas that you have in the comments below!
Update: I had problems adhering the strips made from the sticker release sheets and double sided tape release paper using a tape runner – probably because the surface was designed to removed such adhesive easily from the sheets. You should use a glue stick or any wet adhesive, though note that the surface will be slippery when you put it down.